
How to integrate EPOS NOW via Kayana Partner Admin
Last updated Dec 25, 2025
When you integrate EPOS Now through Kayana Partner Admin, Kayana’s customer-facing devices (such as kiosks, QR ordering, or online ordering) capture order information and send it directly to the EPOS Now cloud system.
The integration helps ensure orders placed through Kayana are visible, tracked, and managed within EPOS Now, rather than existing as a separate workflow.
In simple terms:
Orders are taken on Kayana → securely passed to EPOS Now → handled in EPOS Now like regular orders.
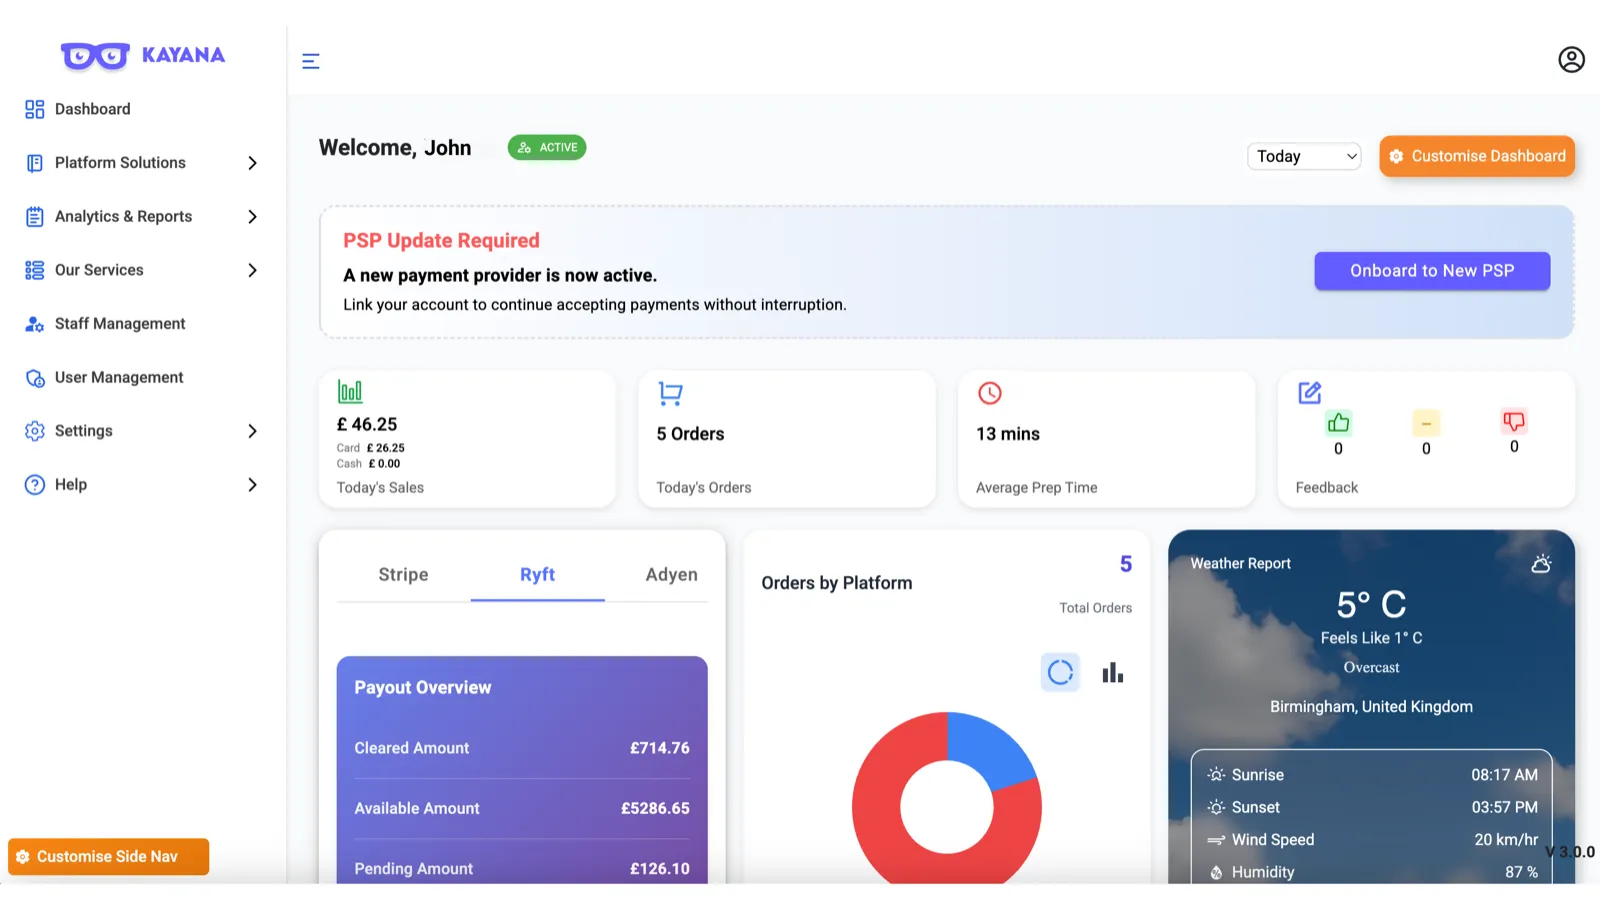
Step 1: Access Your Settings
- Log in to your Kayana Partner Admin dashboard.
- In the left-hand navigation sidebar, click on Settings.
- This will open a dropdown menu; select Account Settings.
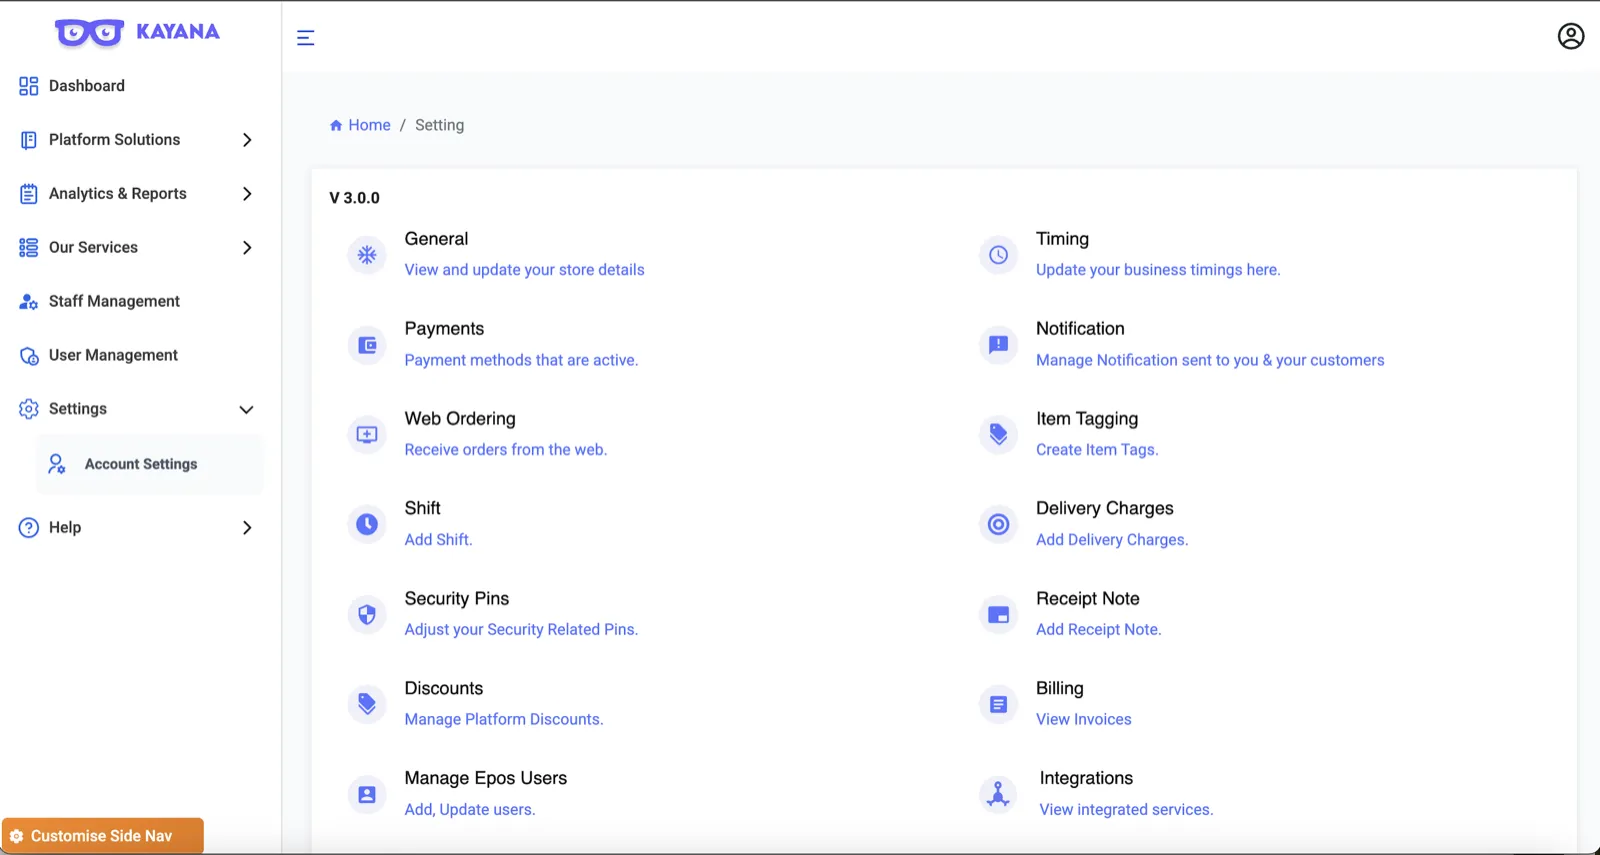
Step 2: Navigate to Integrations
- On the main Settings page, you will see a grid of options.
- Locate the Integrations tile at the bottom right and;
- Click on View integrated services.
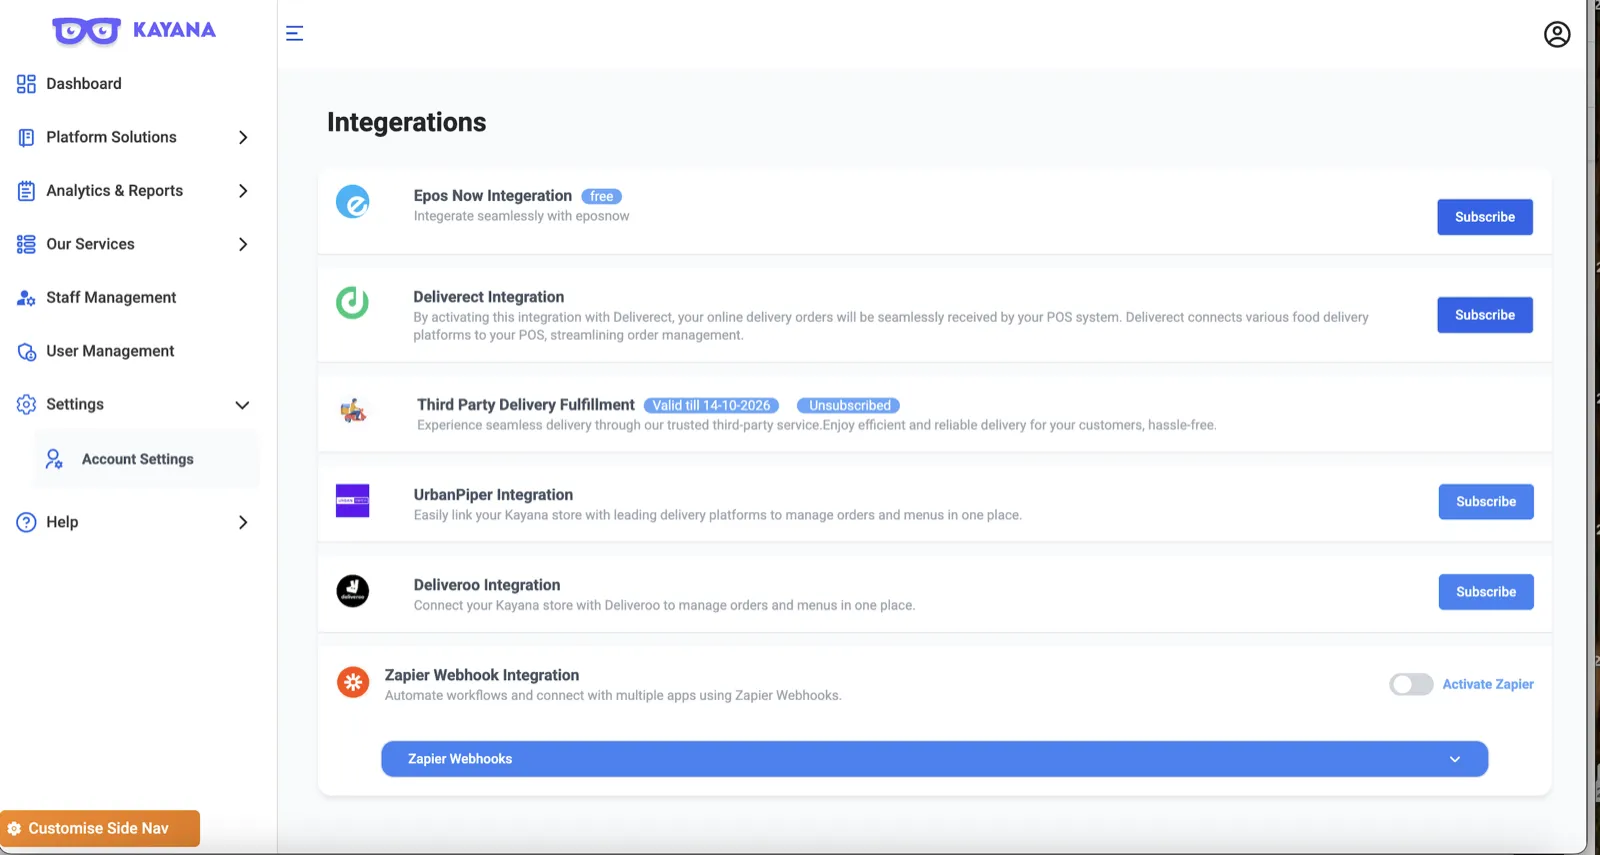
Now Step 3: Locate Epos Now
In the list of available integrations, find Epos Now Integration.
- Note: You will see a blue Subscribe button on the right-hand side of the Epos Now row. Since this integration is currently offered for free, clicking this will not incur any additional charges.
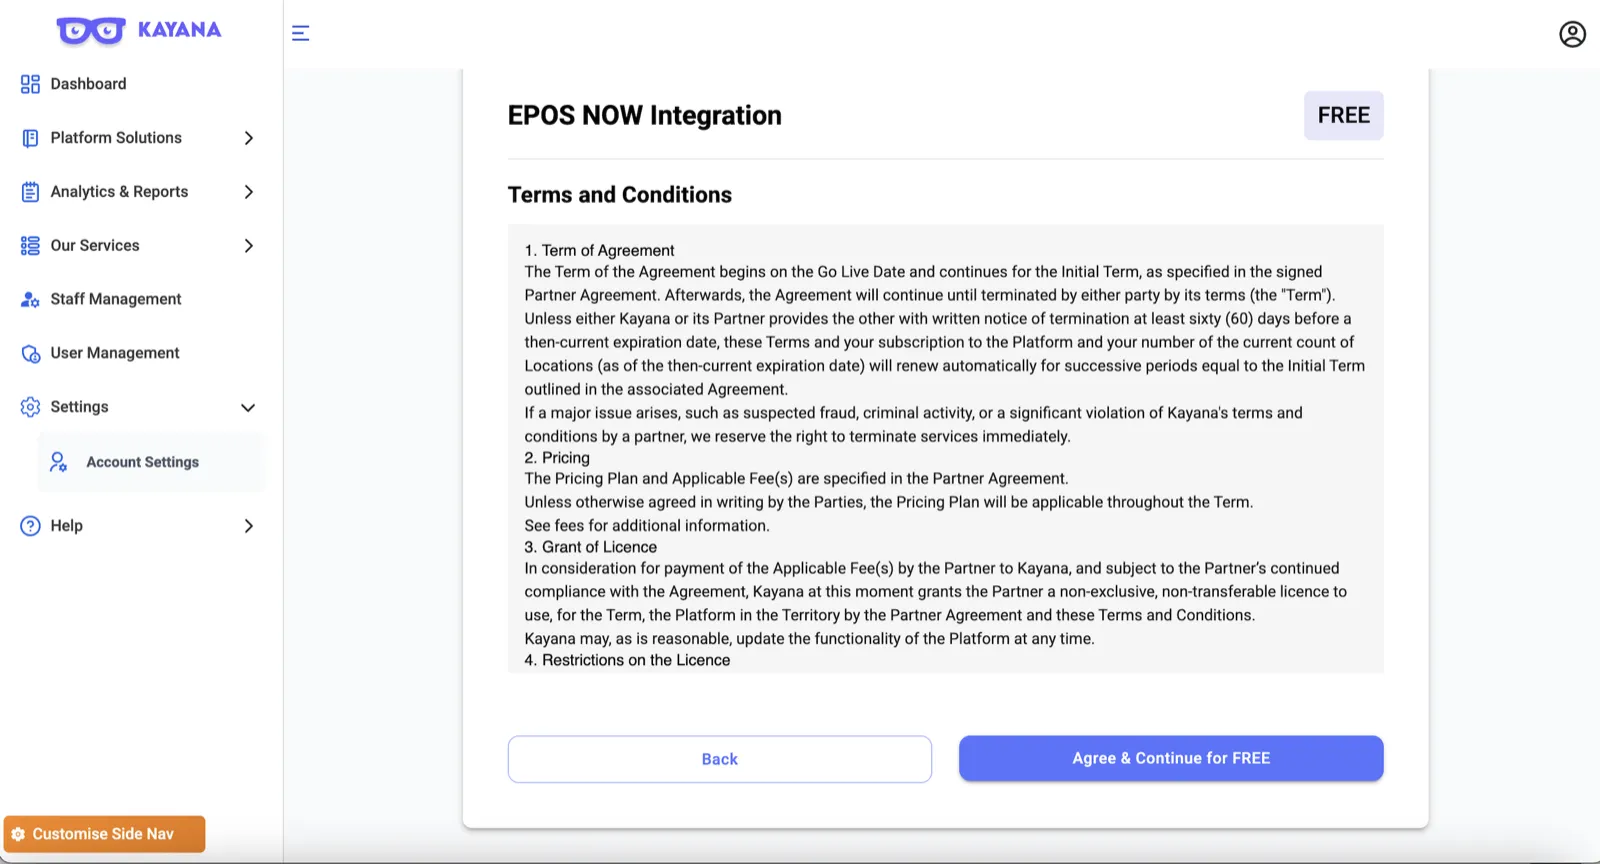
Step 4: Review Terms and Conditions
After you click "Subscribe," the system directs you to the Terms and Conditions page for the Epos Now Integration.
- Take a moment to review the Term of Agreement, Pricing, and Licensing details.
- Once you have read through the document, scroll to the bottom.
Step 5: Confirm Activation
Click the blue button labeled Agree & Continue for FREE.
Once done, the system will process your request. You will be redirected back to the Integrations list, where the "Subscribe" button will no longer be visible, indicating that the integration is now active.
Next Steps
Once EPOS Now integration is active, test a sample order from your kiosk, QR ordering, or online ordering system to confirm that it appears correctly on your EPOS Now till, and refer to the How to Integrate a Kayana Self-Service Kiosk with EPOS Now Tills guide if you need help connecting your devices.