
How to Upload a Screensaver on the Self-Service Kiosk (SSK) via Partner Admin
Last updated Mar 27, 2026
You can personalise your Self-Service Kiosk (SSK) by uploading a custom screensaver from the Partner Admin portal. Screensavers allow you to display branded videos when the kiosk is idle.
Before You Start
The Kiosk Screensaver feature requires an active subscription.
- Subscription cost: £99 per year
- This subscription allows you to upload custom video screensavers for your kiosk.
Screensavers help keep your kiosk visually engaging, aligned with your brand, and attractive to customers during idle times.
Step 1: Log in to Partner Admin
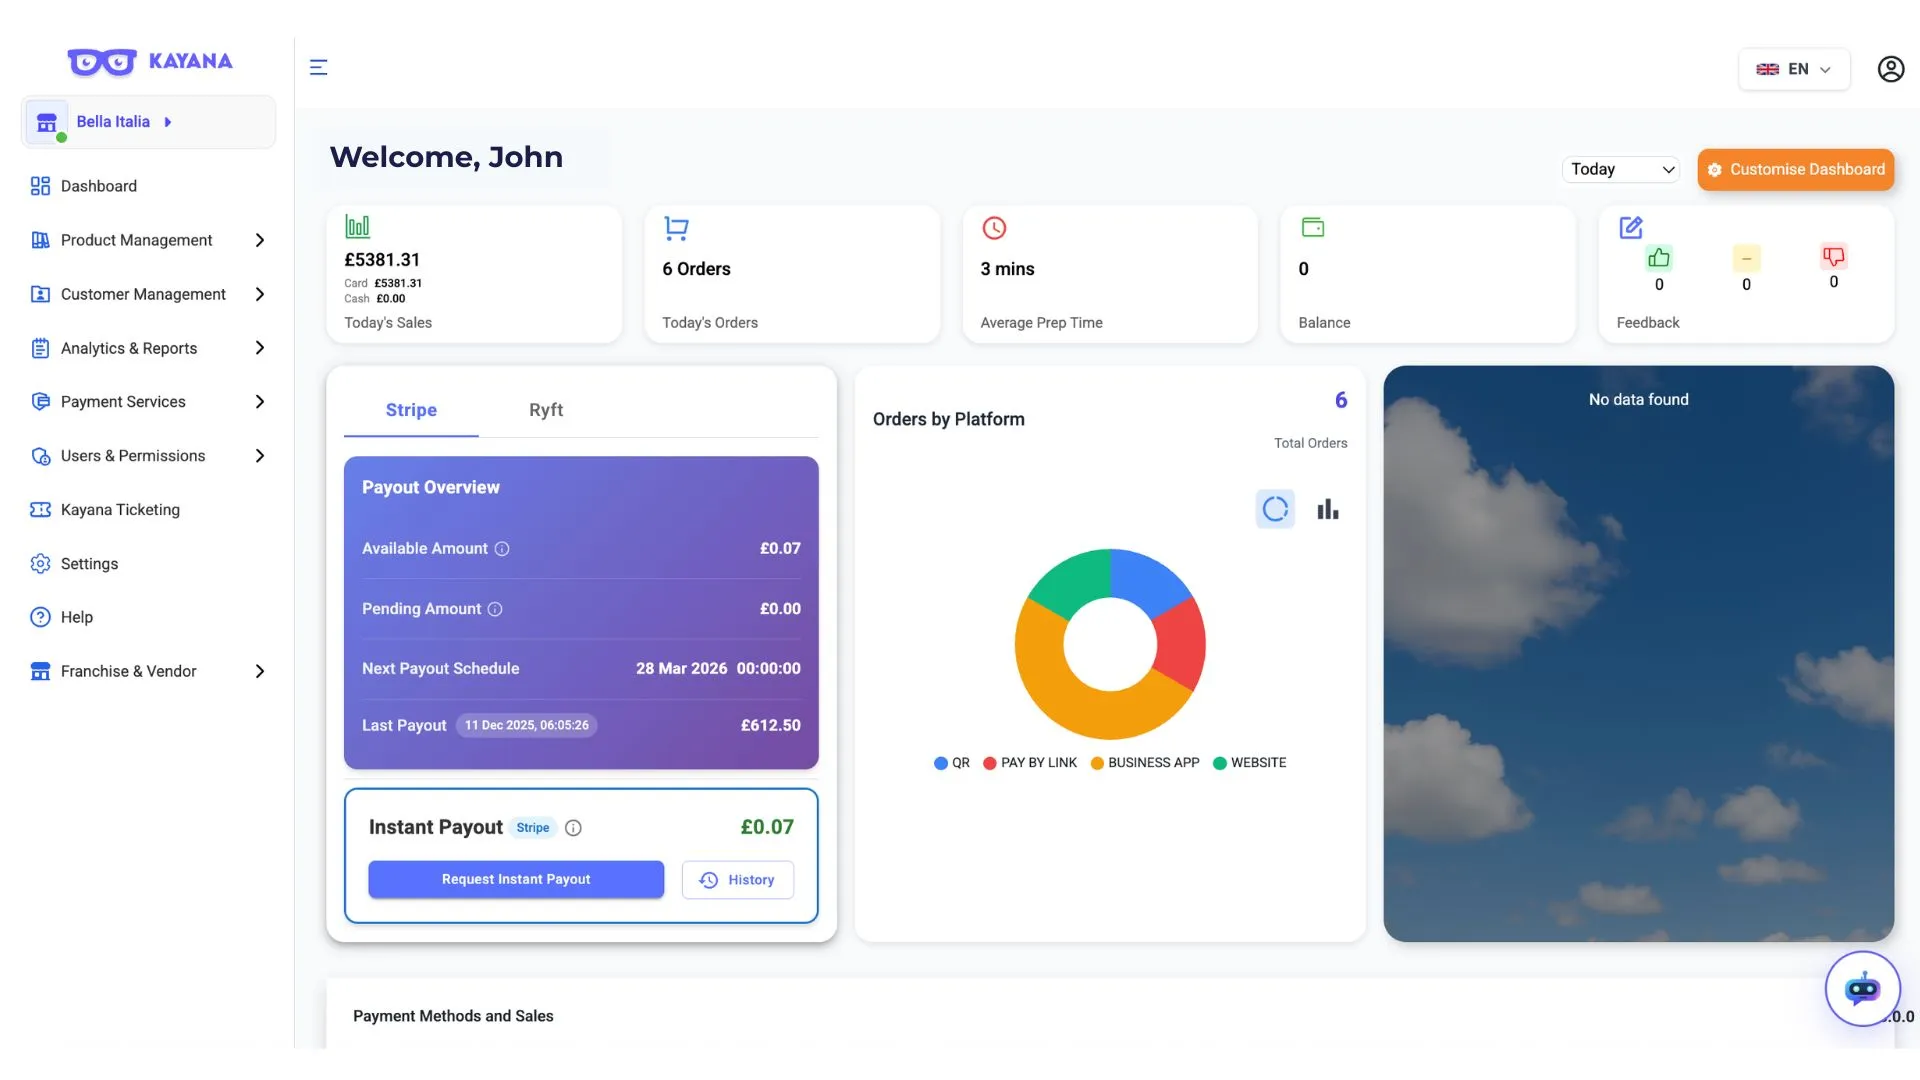
- Open the Kayana Partner Admin portal.
- Log in using your Partner Admin credentials.
Step 2: Open Additional Settings
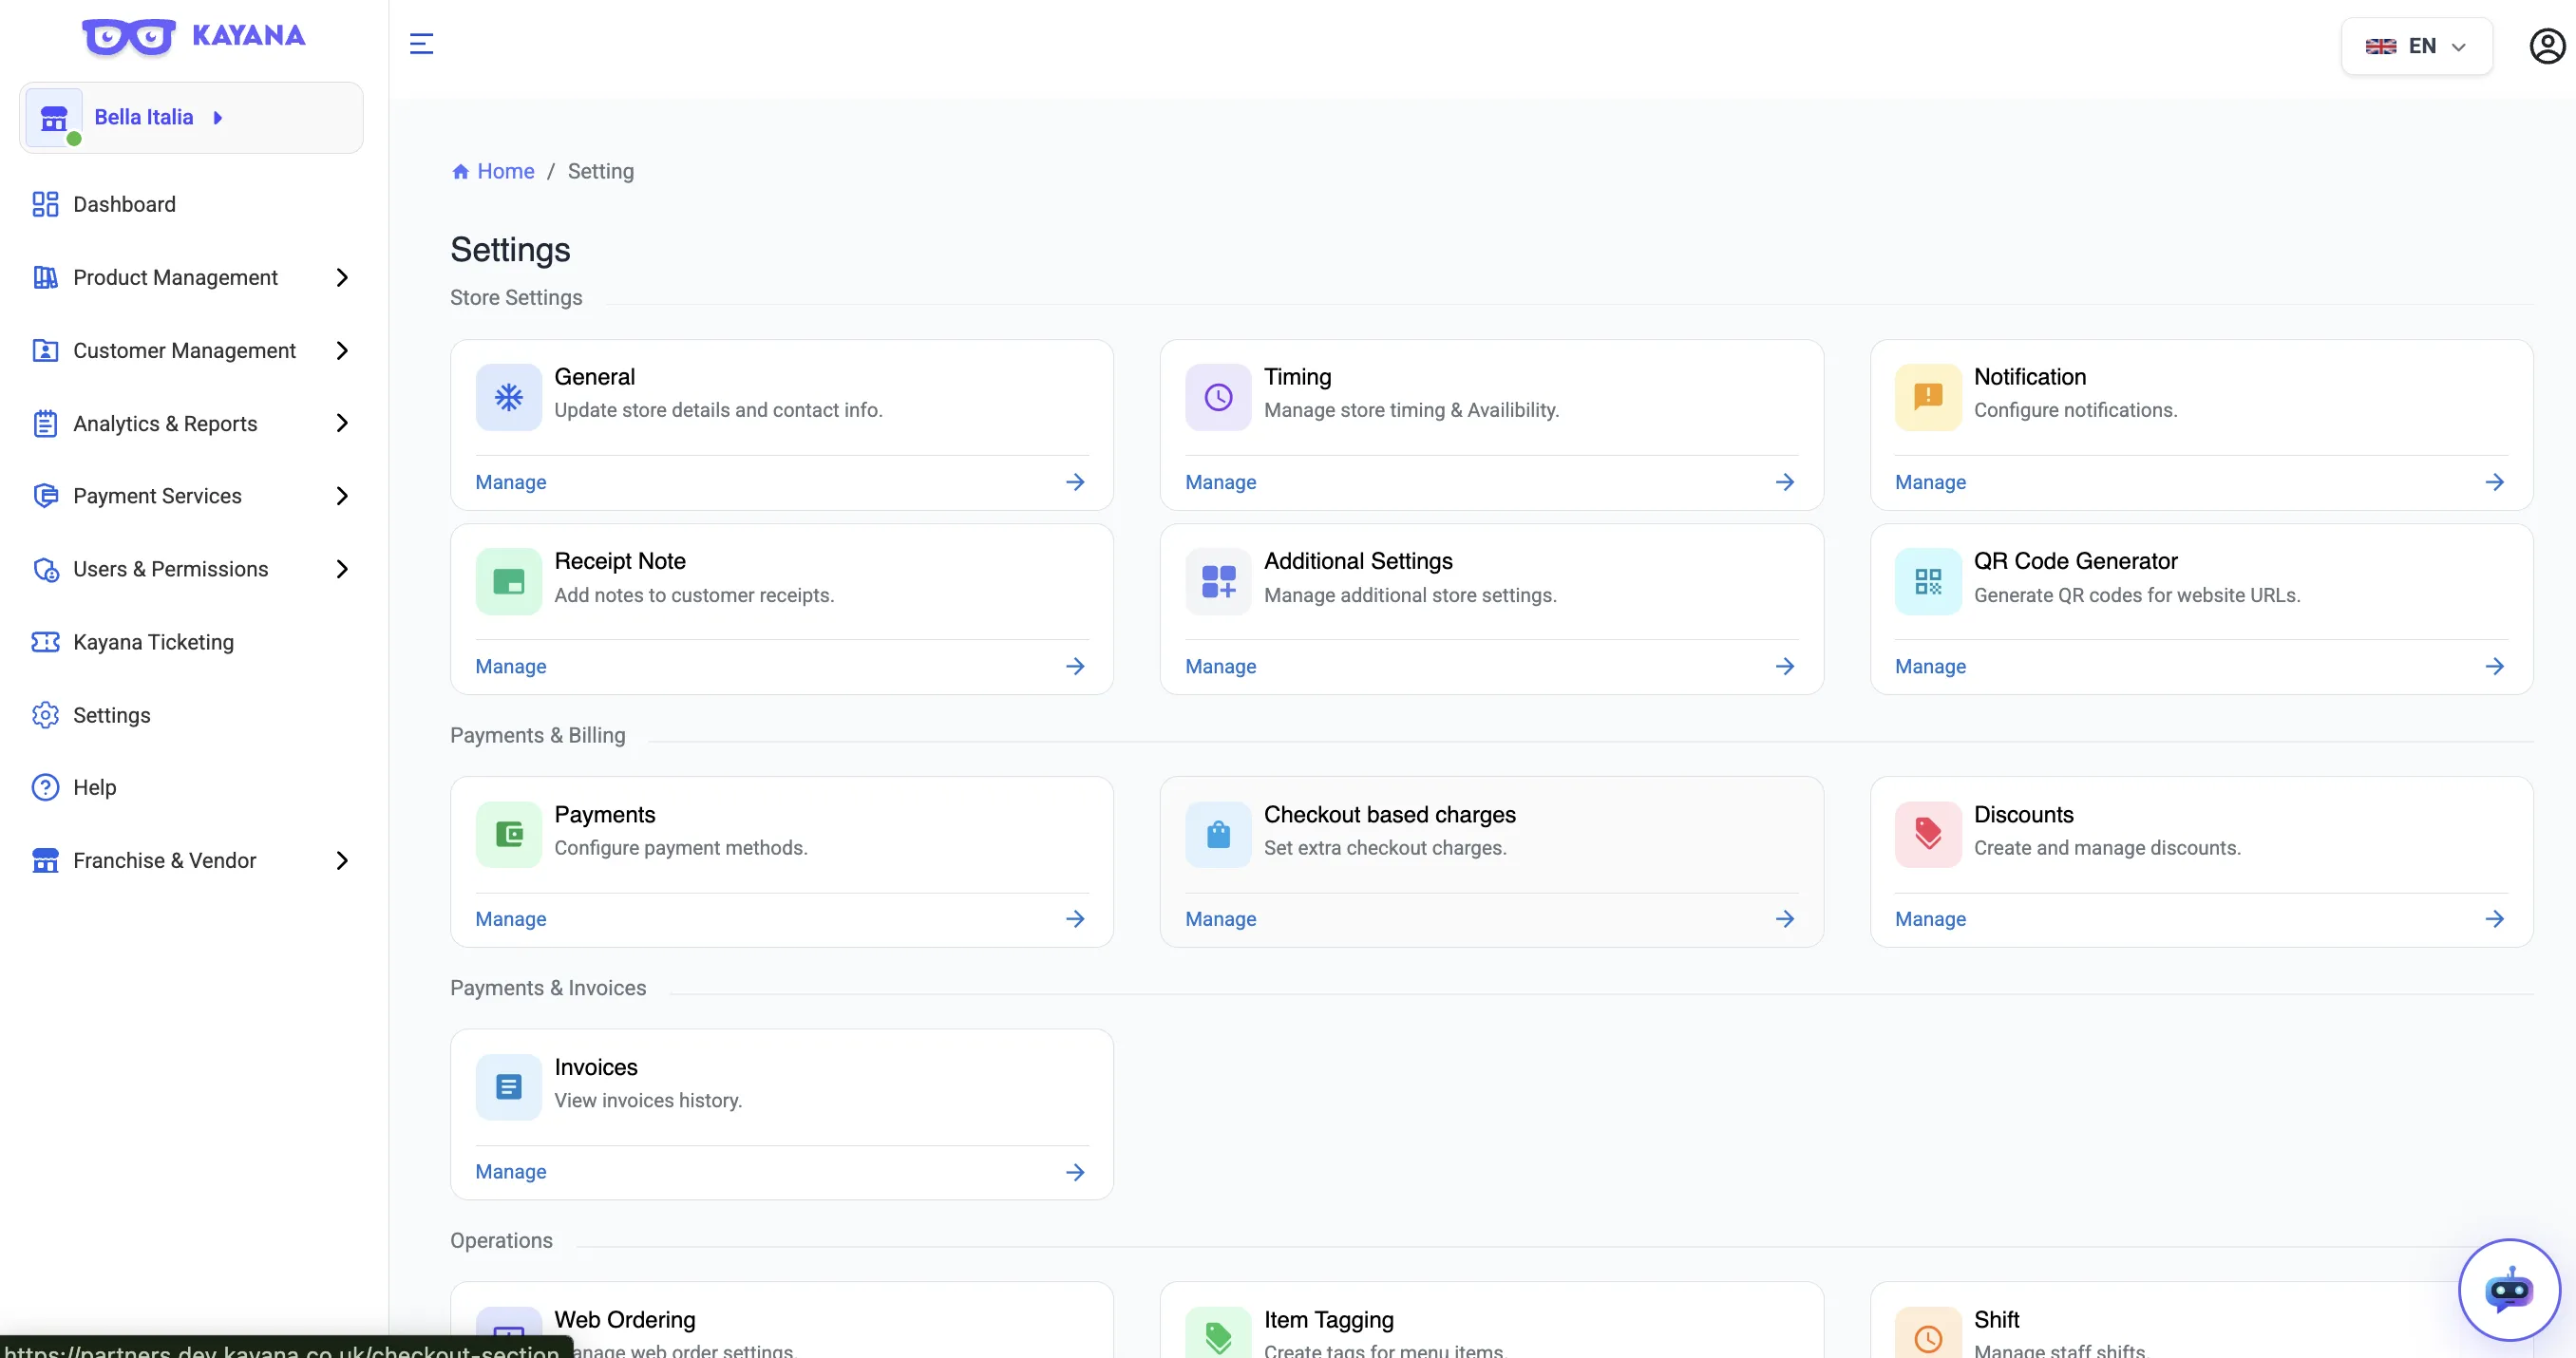
- From the left-hand sidebar, click Settings.
- On the Settings dashboard, locate the Additional Settings option.
- Click Additional Settings.
Step 3: Subscribe to the Kiosk Screensaver Service
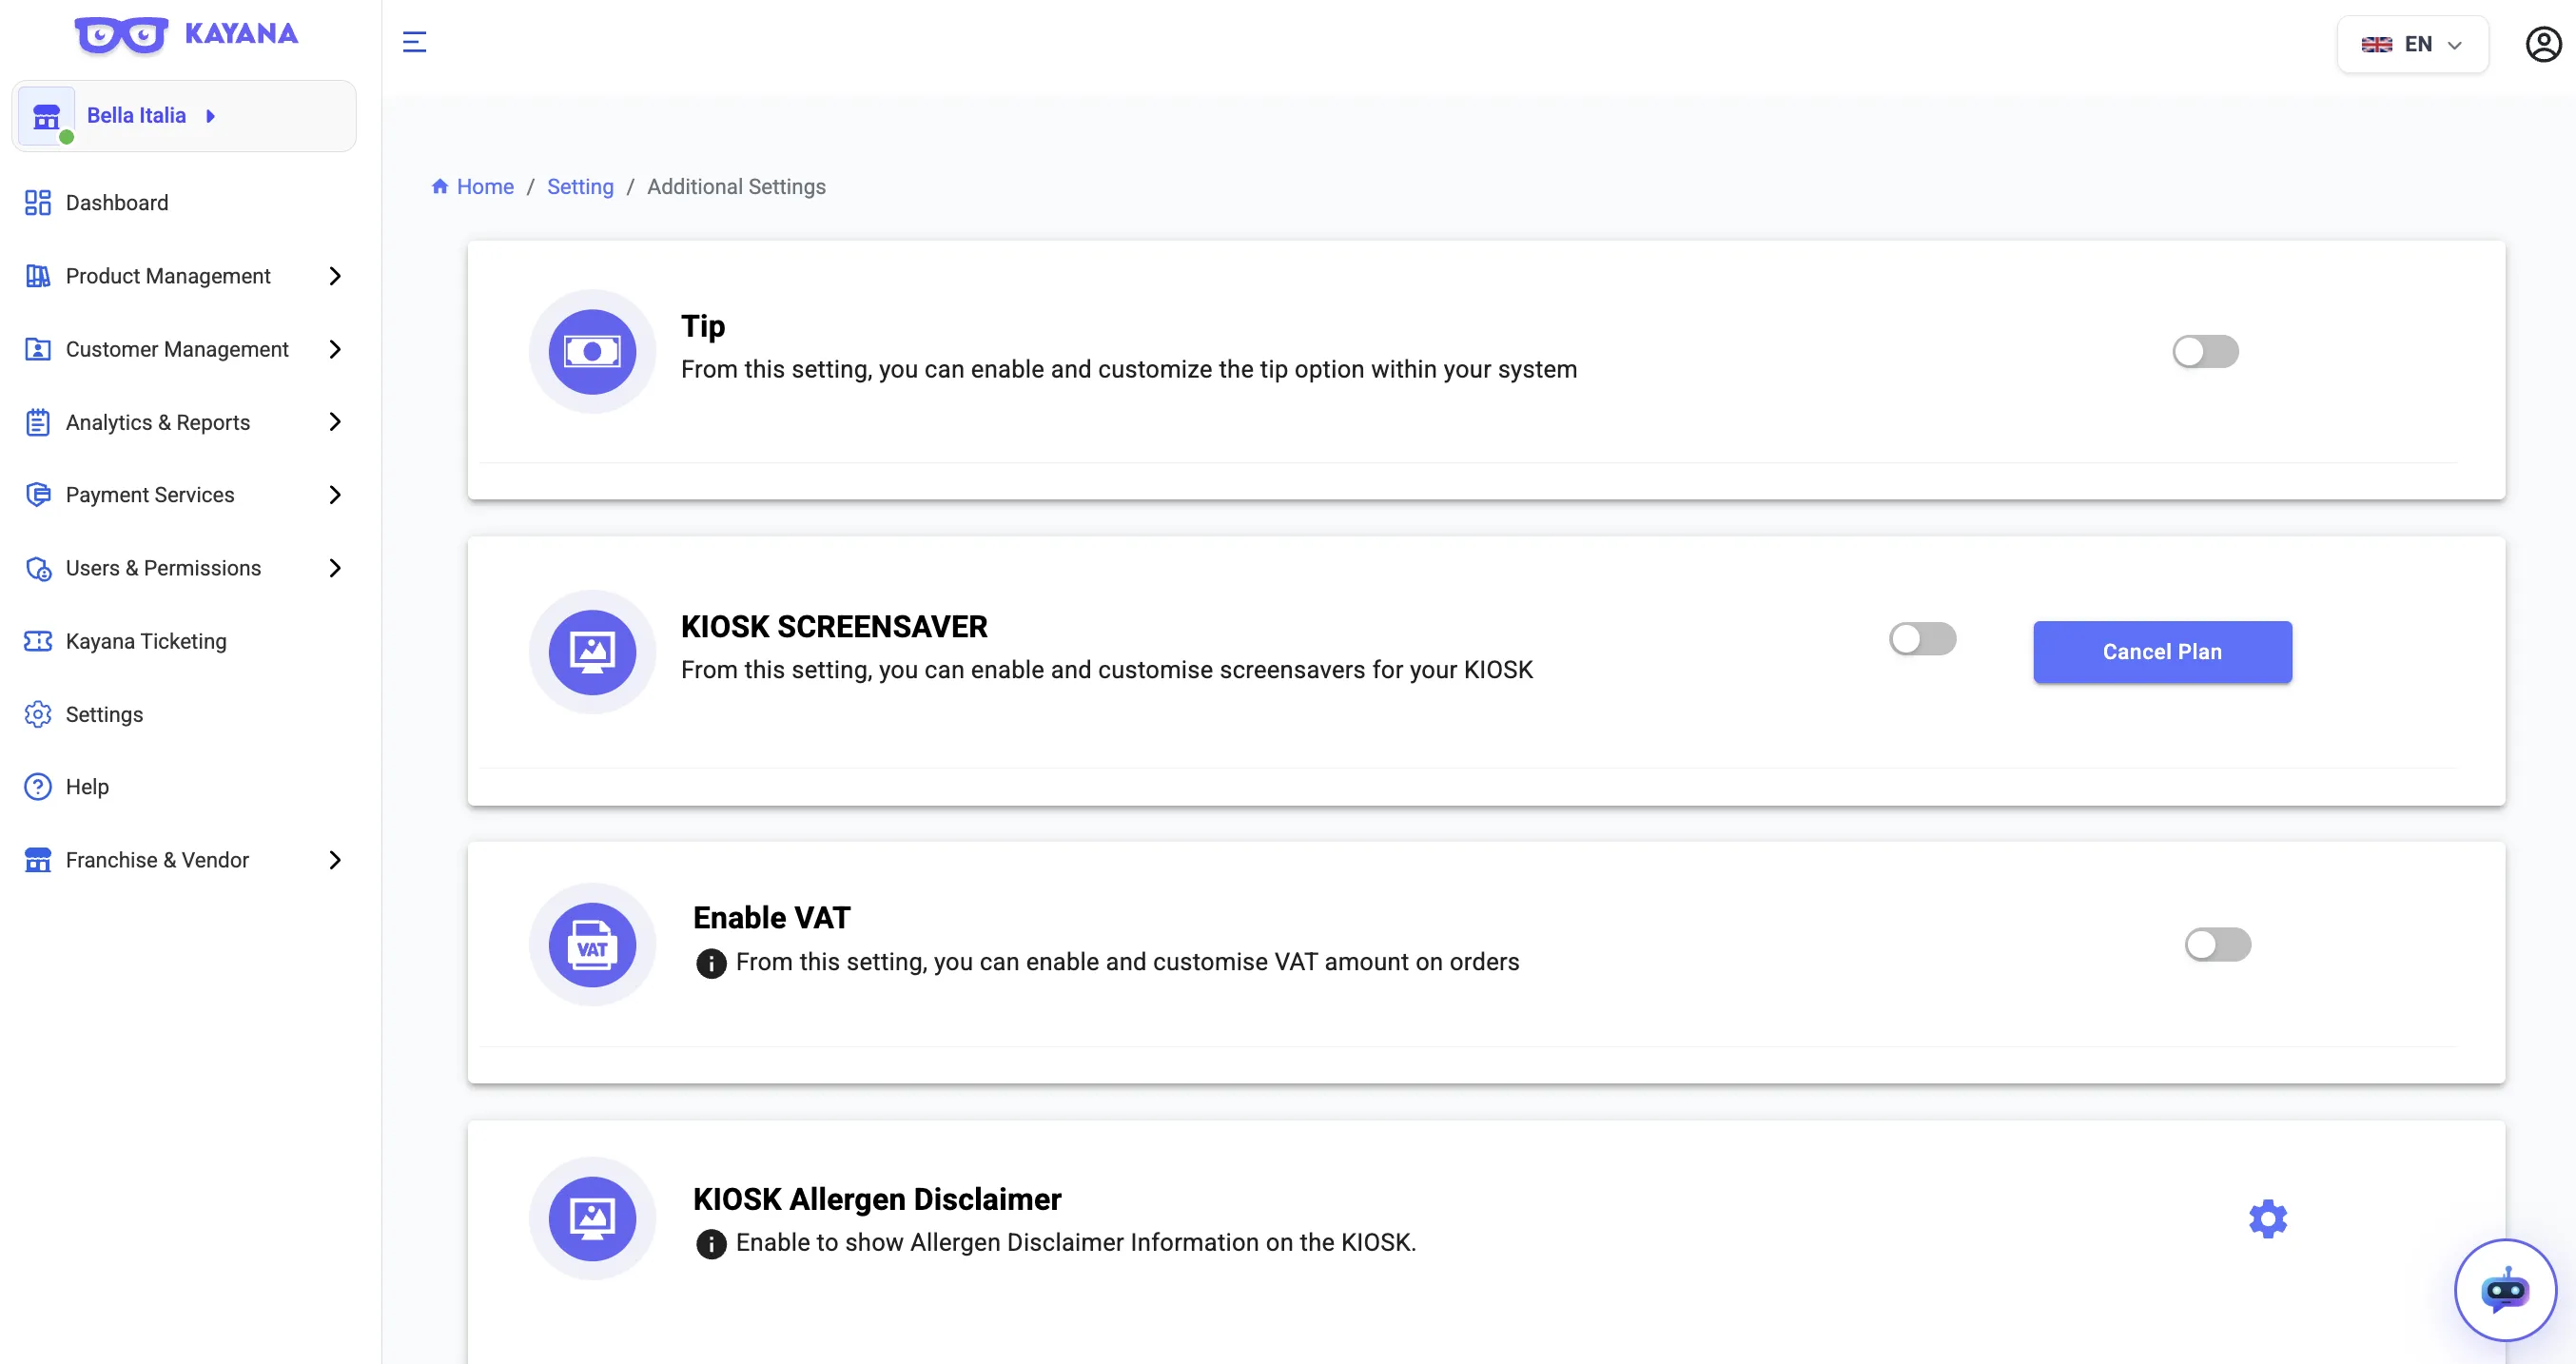
- Locate the Kiosk Screensaver option.
- Click Subscribe to activate the feature.
- Proceed to checkout.
- Complete the payment (£99 per year) using any of the available payment methods.
Once the payment is successful, the Kiosk Screensaver feature will be activated.
Step 4: Enable the Screensaver Feature
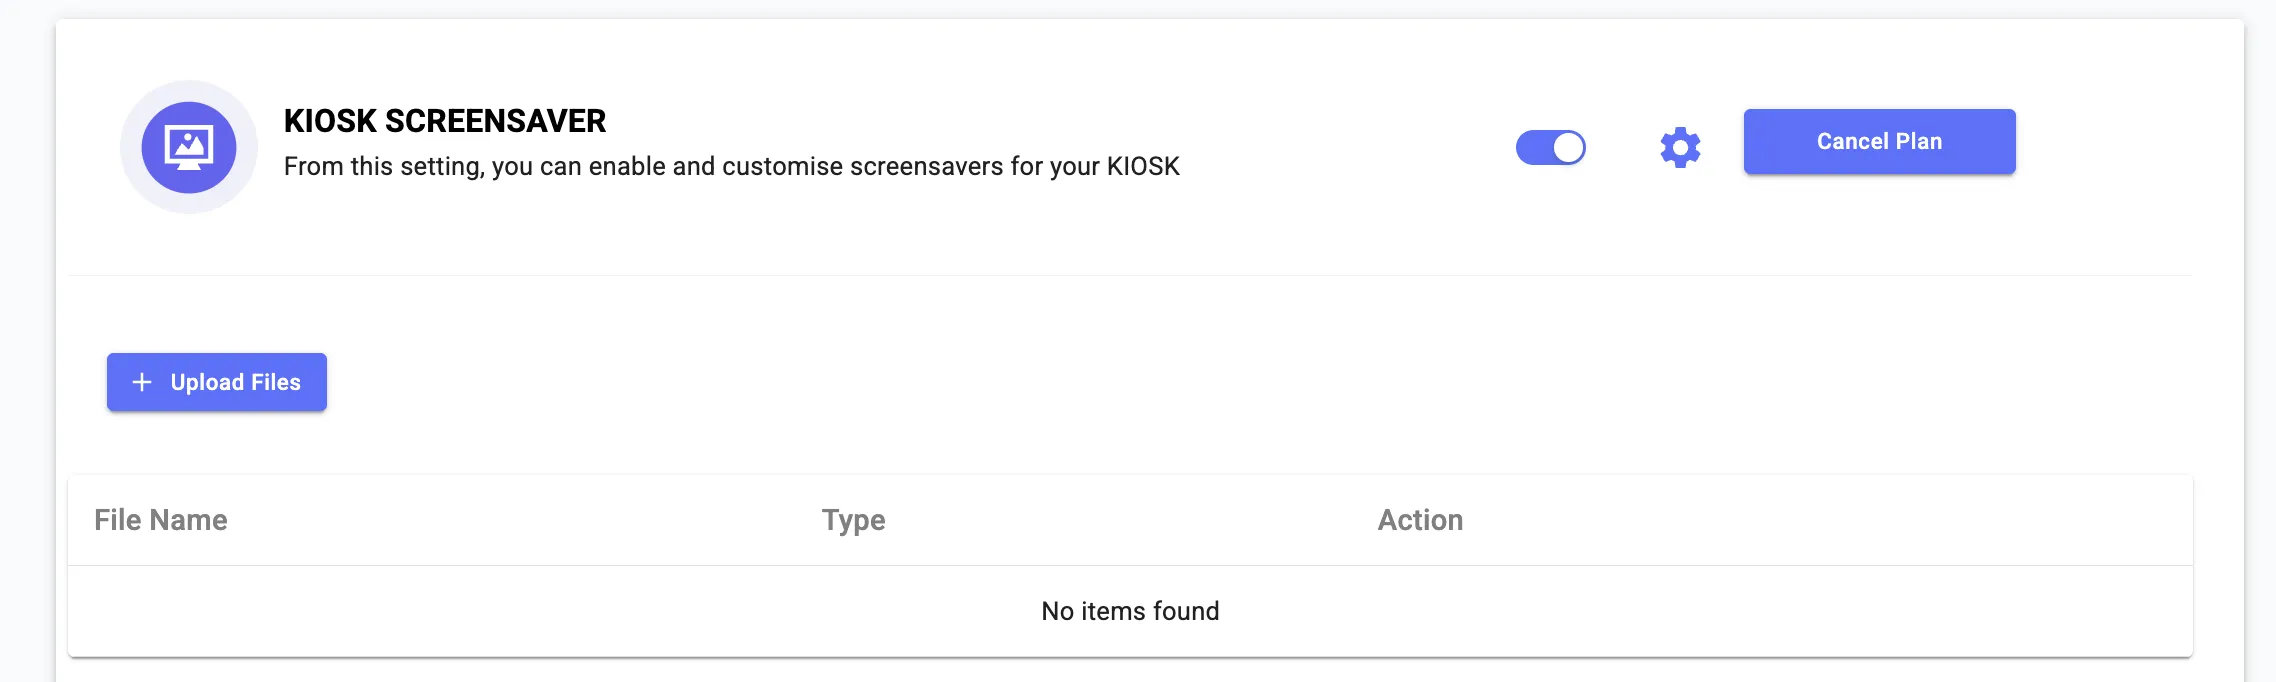
- Return to the Additional Settings page.
- Locate the Kiosk Screensaver card.
- Toggle the Kiosk Screensaver switch ON.
- Click the Settings icon (gearwheel) to configure the screensaver.
Step 5: Upload the Screensaver File
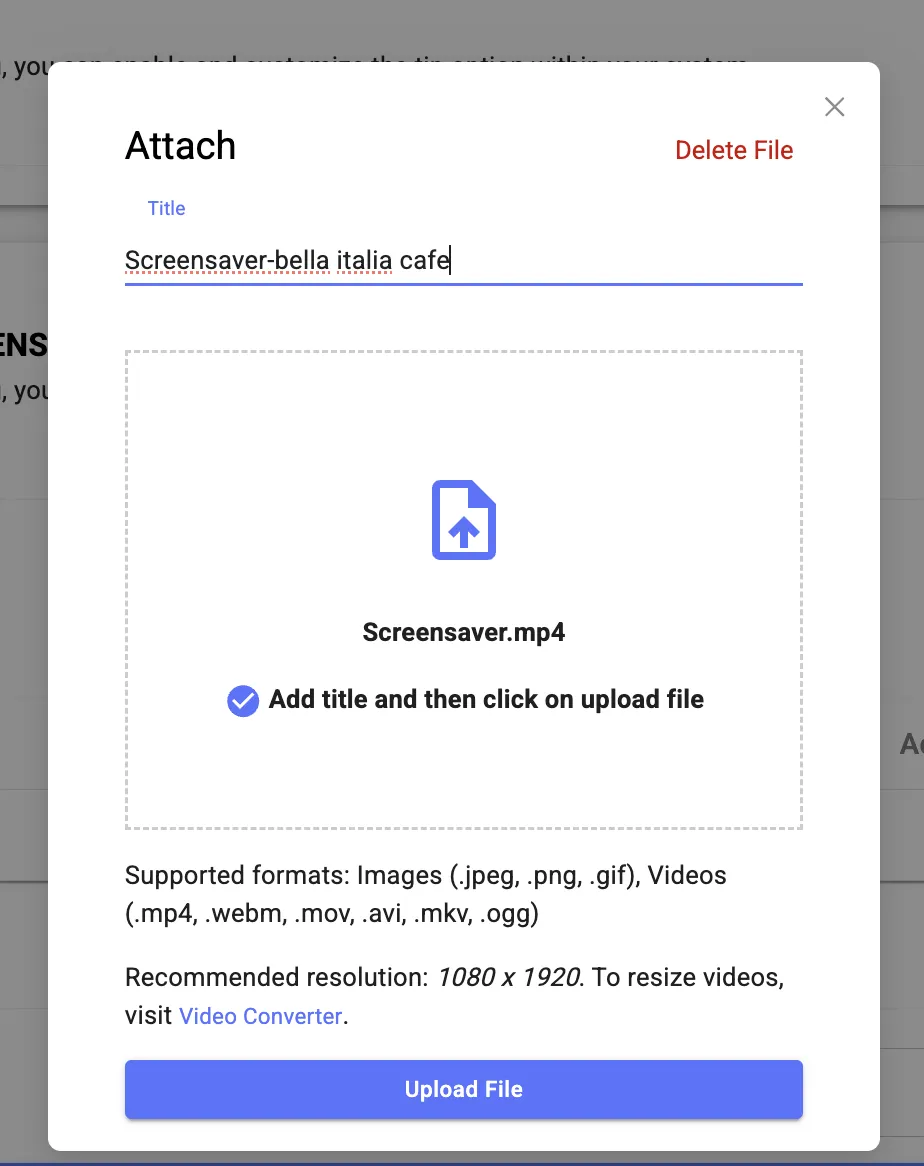
- Click Upload File.
- Select the video file you want to use as the screensaver.
- Enter a title for the screensaver.
- Click Upload File to confirm.
Step 6: Screensaver Activation
Once the upload is complete:
- The screensaver will be applied to your Self-Service Kiosk (SSK).
- The video will play when the kiosk is idle.
You will also see a toast notification confirming that the screensaver has been uploaded successfully.